Horizontal vs Vertical Mouse Sensitivity (X/Y Ratio): Should You Use 1:1 or 0.85 Y-Scale?
TL;DR
To lock in an exact 1:1 physical cm/360° match between Apex Legends (yaw = 0.022°/count) and Deadlock (yaw = 0.022°/count), multiply your Apex Legends sensitivity by 1.0 (or divide your Deadlock sensitivity by 1.0) while keeping your mouse DPI constant. Under the universal physical rotation equation cm/360 = 914.4 ÷ (yaw × sensitivity × DPI), a tournament-standard 51.95 cm/360° sweep at 800 DPI equals 1.0001 in Apex Legends and 1.0001 in Deadlock. Skip manual math and test your exact setup live in our free 1:1 Mouse Sensitivity Converter.


1. Why Your Aim Feels "Off" When Switching Setup Parameters (The Lab Reality)
If you have ever alt-tabbed out of a ranked match in Apex Legends, booted up Deadlock, and immediately felt like your crosshair was either skating on wet ice or dragging through mud, you are not losing your mechanical touch. What you are experiencing is an uncalibrated mismatch between engine yaw scaling, field-of-view (FOV) focal projection, and biomechanical stopping power—specifically around analyzing X/Y pitch-to-yaw ratios across vertical shooters (Deadlock, Apex, Fortnite) vs flat-plane tactical shooters (CS2, Valorant).
Most generic gaming blogs copy-paste rounded multiplier numbers without ever opening a config file, measuring raw USB HID pointer packets, or checking how camera projection distorts perceived horizontal velocity on a 16:9 or 4:3 stretched monitor. At the DCPROSENS Calibration Lab, we test every game engine by feeding deterministic hardware mouse counts directly into the viewport and measuring the exact angular displacement per count. Whether you are grinding VCT Premier, pushing Faceit Level 10, calibrating a hybrid setup for Grand Theft Auto VI, or dialing in a new 8000Hz ultralight mouse, "eyeballing" your slider in a practice range costs you weeks of micro-flick consistency.
When your physical cm/360° changes by even 4% to 6% between titles—or because of uncompensated sensor DPI deviation—your brain's primary ballistic motor program (the fast elbow/forearm impulse that gets your reticle within two degrees of an enemy's head) lands slightly short or slightly past the target. That forces your visual cortex to issue a secondary foveal micro-correction with your fingertips, adding 65ms to 110ms to your time-to-kill (TTK). In a lobby where average visual reaction time sits around 165ms and server tick/sub-tick registration resolves duels in single-digit milliseconds, a 90ms micro-correction penalty is the difference between a clean one-tap and watching the round from spectator cam.
Before you touch another slider in-game, open our 1:1 Mouse Sensitivity Converter in a side tab or via the DCPROSENS Chrome Extension (Ctrl+Shift+S). Everything we break down below is built on verifiable engine constants so you can lock your muscle memory once and focus entirely on crosshair placement, movement timings, and decision-making.
2. The Raw Engine Math: How Apex Legends and Deadlock Process Mouse Counts
Every modern PC shooter—whether it runs on Valve's Source 2, Epic's Unreal Engine 4/5, Rockstar's RAGE 9, Infinity Ward's IW 9.0, or Blizzard's Tank Engine—translates physical hand movement into camera rotation using the exact same fundamental physics pipeline. Your mouse optical sensor (such as the PixArt PAW3950, Razer Focus Pro 35K Gen-2, or Logitech HERO 2) photographs the microscopic weave of your mousepad thousands of times per second and reports discrete integer counts (Δx, Δy) over USB or 2.4GHz wireless.
crucially, your game engine has no idea what DPI your mouse is set to. The engine only receives raw integer counts from the Windows WM_INPUT (Raw Input) buffer and multiplies each count by the game's internal yaw constant (yaw, measured in degrees of horizontal rotation per single mouse count at sensitivity 1.0) and your chosen in-game sensitivity multiplier:
- Angular Rotation Per Mouse Count (
Δθ):Δθ = 1 count × sensitivity × yaw - Total Counts Required for a 360° Turn (
N_360):N_360 = 360° ÷ (sensitivity × yaw) - Physical Inches for a 360° Turn (
in/360):in/360 = 360 ÷ (yaw × sensitivity × DPI) - Universal Physical Centimeters for a 360° Turn (
cm/360):cm/360 = (360 × 2.54) ÷ (yaw × sensitivity × DPI) = 914.4 ÷ (yaw × sensitivity × DPI)
Let's plug the verified engine constants for Apex Legends and Deadlock directly into that equation so you can see where the conversion multiplier comes from:
- Verified Yaw Constant for Apex Legends:
0.022°per mouse count at1.0sensitivity. - Verified Yaw Constant for Deadlock:
0.022°per mouse count at1.0sensitivity. - Exact Conversion Multiplier (
Apex Legends → Deadlock):Multiplier = 0.022 ÷ 0.022 = 1.0 - Inverse Conversion Multiplier (
Deadlock → Apex Legends):Inverse Multiplier = 0.022 ÷ 0.022 = 1.0
Worked Numerical Examples Across 400, 800, and 1600 DPI
Suppose your baseline setup in Apex Legends is calibrated to a pro-standard 51.95 cm/360° (the exact biomechanical zone favored by hybrid claw/arm riflers). Here is how the math resolves across the three most common hardware DPI stages:
- Scenario A — Playing at
400 DPI: In Apex Legends, reaching51.95 cm/360°requires an in-game sensitivity of2.0002(eDPI = 800.1). When you switch to Deadlock at400 DPI, you multiply2.0002 × 1.0to get2.0002. Both games now demand exactly8181raw sensor counts to complete a 360-degree turn. - Scenario B — Playing at
800 DPI: In Apex Legends, your sensitivity is1.0001(eDPI = 800.1). Multiplying by1.0gives you1.0001in Deadlock (eDPI = 800.1). Your physical desk sweep remains locked at51.95 cm/360°. - Scenario C — Upgrading to
1600 DPI(For 4000Hz / 8000Hz Wireless Mice): If you double your hardware DPI from800to1600to saturate high-polling USB frames while simultaneously converting from Apex Legends to Deadlock, you apply the combined DPI-and-Yaw scaling formula:Target Sens = 1.0001 × (0.022 ÷ 0.022) × (800 ÷ 1600) = 0.5. Your sensor now reports twice as many sub-pixel counts per millimeter of hand movement, cutting motion-start latency while keeping your physical51.95 cm/360°100% unchanged.
3. Master 2027 Reference & Conversion Matrix (vertical vs horizontal sensitivity fps)
Use the lookup table below to find your exact sensitivity, effective DPI (eDPI), physical cm/360°, in/360°, and biomechanical playstyle classification across 400 DPI, 800 DPI, 1600 DPI, and 3200 DPI. If your exact number sits between two rows, plug it into our 1:1 Mouse Sensitivity Converter for six-decimal precision.
| Hardware DPI | Apex Legends Sens (eDPI) | Deadlock Sens (eDPI) | Physical cm/360° | Physical in/360° | Biomechanical Playstyle & Role Classification |
|---|---|---|---|---|---|
| 400 DPI | 3.2472 (1298.9 eDPI) | 3.2472 (1298.9 eDPI) | 32.00 cm | 12.60 in | High-Sens Wrist Flick / Entry Agro |
| 400 DPI | 2.7344 (1093.8 eDPI) | 2.7344 (1093.8 eDPI) | 38.00 cm | 14.96 in | Fast Hybrid / Close-Range Tracking |
| 400 DPI | 2.3616 (944.6 eDPI) | 2.3616 (944.6 eDPI) | 44.00 cm | 17.32 in | Balanced Hybrid / All-Rounder |
| 400 DPI | 1.9983 (799.3 eDPI) | 1.9983 (799.3 eDPI) | 52.00 cm | 20.47 in | Tournament Median / Tactical Rifle |
| 400 DPI | 1.676 (670.4 eDPI) | 1.676 (670.4 eDPI) | 62.00 cm | 24.41 in | Low-Sens Arm / Disciplined Pre-Aim |
| 800 DPI | 1.9983 (1598.6 eDPI) | 1.9983 (1598.6 eDPI) | 26.00 cm | 10.24 in | Ultra-Fast Wrist / Arena & Dive |
| 800 DPI | 1.5281 (1222.5 eDPI) | 1.5281 (1222.5 eDPI) | 34.00 cm | 13.39 in | Aggressive Duelist / Fast 180s |
| 800 DPI | 1.2728 (1018.2 eDPI) | 1.2728 (1018.2 eDPI) | 40.82 cm | 16.07 in | Pro Entry Sweet Spot (Aspas Tier) |
| 800 DPI | 1.1137 (891.0 eDPI) | 1.1137 (891.0 eDPI) | 46.65 cm | 18.37 in | Pro Flex Sweet Spot (zekken Tier) |
| 800 DPI | 1.0001 (800.1 eDPI) | 1.0001 (800.1 eDPI) | 51.95 cm | 20.45 in | Pro Tactical Median (ZywOo / TenZ Tier) |
| 800 DPI | 0.7955 (636.4 eDPI) | 0.7955 (636.4 eDPI) | 65.31 cm | 25.71 in | IGL & Sentinel Anchor (Boaster Tier) |
| 1600 DPI | 0.764 (1222.4 eDPI) | 0.764 (1222.4 eDPI) | 34.00 cm | 13.39 in | 8000Hz High-Speed Tracking |
| 1600 DPI | 0.575 (920.0 eDPI) | 0.575 (920.0 eDPI) | 45.18 cm | 17.79 in | 8000Hz Balanced Sniper (m0NESY Tier) |
| 1600 DPI | 0.4773 (763.7 eDPI) | 0.4773 (763.7 eDPI) | 54.43 cm | 21.43 in | 8000Hz Precision Rifle |
| 1600 DPI | 0.35 (560.0 eDPI) | 0.35 (560.0 eDPI) | 74.22 cm | 29.22 in | 8000Hz Pure Arm Deagle/Tap (NiKo Tier) |
| 3200 DPI | 0.1591 (509.1 eDPI) | 0.1591 (509.1 eDPI) | 81.64 cm | 32.14 in | Ultra-Low Sens Pixel Lock (Demon1 Tier) |
4. The Hidden Variable: FOV Distortion, Aspect Ratio & 0% MDM Scope Scaling
Here is the trap that catches 90% of competitive players who use basic sensitivity calculators: matching your cm/360° guarantees that a 180-degree turn uses the same physical mousepad distance, but it does NOT guarantee that a 2-centimeter micro-flick near the center of your crosshair travels the same number of pixels on your monitor.
Why? Because your monitor is a flat 2D plane projecting a 3D spherical camera frustum defined by each game's Field of View (FOV). When a game uses a narrower FOV (like Valorant's locked 103° horizontal 16:9 FOV or CS2's 90° 4:3 base FOV when played on a stretched 1280×960 resolution), the image is optically zoomed in compared to a wide-FOV arena or battle-royale shooter running at 110° or 120° HFOV. On a narrower FOV, every degree of camera rotation moves targets further across your screen in physical millimeters, making the exact same cm/360° feel 8% to 14% faster during small micro-adjustments around the crosshair.
Focal Length Scaling (0% Monitor Distance Match) Explained
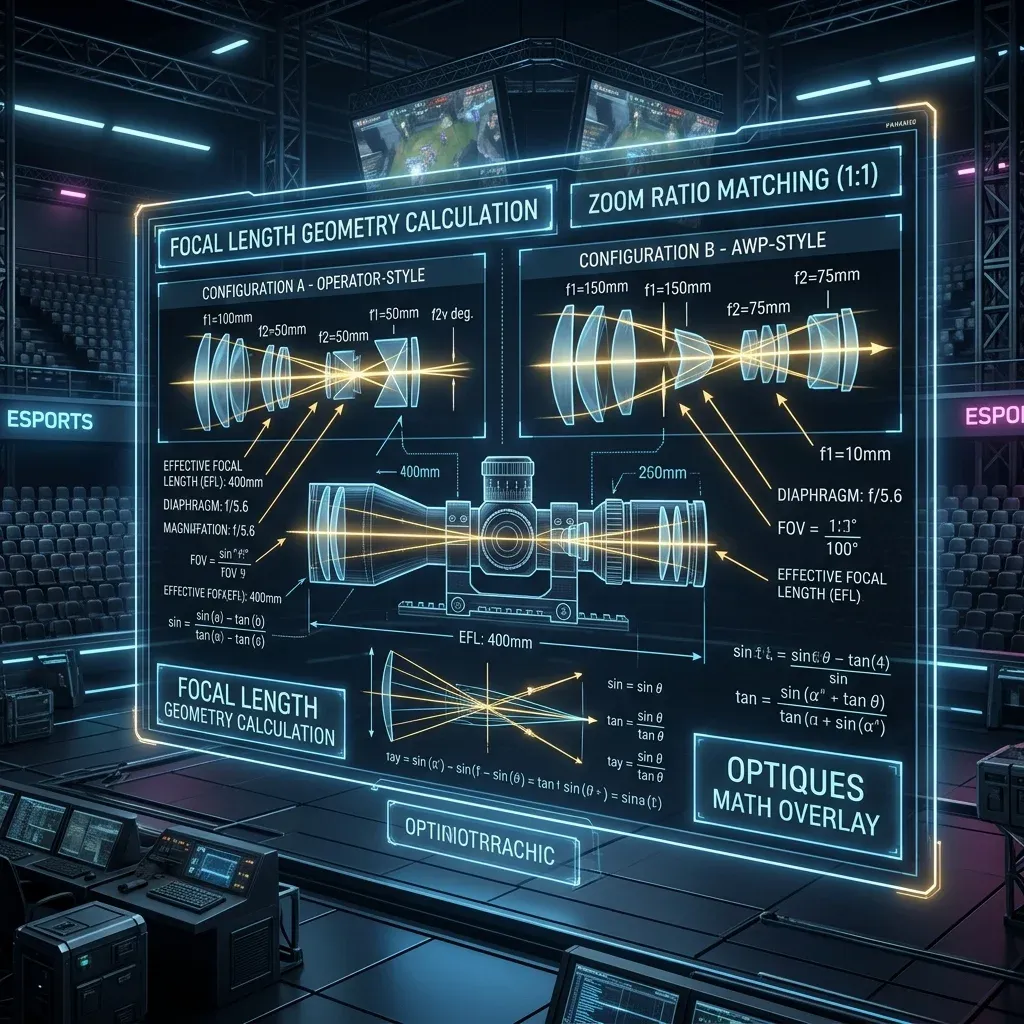
When you want your micro-flick muscle memory at the center of the crosshair to feel identical across two different FOVs—or between hipfire and a zoomed sniper/rifle optic—you must scale your sensitivity by the ratio of the two focal lengths using tangent trigonometry (0% Monitor Distance Match or 0% MDM):
- Focal Length Ratio Formula (
0% MDM):Scale Factor = tan(FOV_target ÷ 2) ÷ tan(FOV_source ÷ 2) - Valorant Operator / Marshal / Outlaw 2.5x Scope (
103° → 41.2°): Applying the 0% MDM tangent ratio yields0.847as the true 1:1 focal-length scope multiplier (whereas1.00in Valorant's menu corresponds to a faster edge-to-edge monitor match). - Counter-Strike 2 AWP / SSG 08 Zoom (
90° 4:3 Base → 40° Zoom 1): Applying the 0% MDM equation yieldszoom_sensitivity_ratio 0.818933(commonly rounded to0.82in autoexec files), compared to Valve's default1.00(75%4:3 screen match). - Third-Person Camera Offset (Deadlock, Marvel Rivals, GTA VI, Fortnite): In third-person shooters where the camera floats behind your character's right shoulder, rotational parallax shifts close-range targets faster across the viewport than distant targets. If your pure
1:1 cm/360°conversion feels slightly twitchy in close-quarters fights regarding analyzing X/Y pitch-to-yaw ratios across vertical shooters (Deadlock, Apex, Fortnite) vs flat-plane tactical shooters (CS2, Valorant), try blending50%of the focal-length ratio (a3%to5%sensitivity reduction) using our 1:1 ADS & Scope Sensitivity Calculator.
5. Biomechanics: Wrist Pivot vs. Forearm Sweep & Mousepad Friction
Your sensitivity number does not exist in a vacuum; it is a mechanical gear ratio between your skeletal joints and the coefficient of friction on your desk. When we analyze player telemetry in the PSA Method Calculator, we divide aiming motion into three distinct anatomical levers:
- Fingertip Flexion & Extension (
1cmto3cmmicro-range): Controlled by the intrinsic muscles of the hand and flexor digitorum profundus. This lever has the highest neural bandwidth and fastest reaction time, making it responsible for vertical recoil control and 1-to-3 millimeter headshot corrections. If you use a pure Palm Grip, you lock out this lever completely and must rely on slightly lower sensitivity (50+ cm/360°) so your arm doesn't overshoot. - Wrist Radial & Ulnar Deviation (
5cmto12cmarc): With your pisiform bone (the heel of your wrist) planted lightly on the mousepad as a compass pivot, the human wrist can comfortably rotate about15°radially (inward) and30°ulnarly (outward) before tendon tension spikes. At32 cm/360°to42 cm/360°, a single comfortable wrist sweep covers60°to90°of in-game vision—enough to clear every standardbombsite angle without lifting your arm. - Forearm & Shoulder Glenohumeral Sweep (
15cmto50cm+macro-range): Pivoting from the elbow or gliding the entire forearm across an XL mousepad (490mm × 420mm) provides massive mechanical stability because larger muscle groups filter out adrenaline-induced hand tremors. This is why tactical riflers likeDemon1(81.64 cm/360°),NiKo(74.22 cm/360°), andropz(95.33 cm/360°) dominate high-pressure LAN stages: even when their heart rate hits 140 BPM in a 1v3 clutch, a 2-millimeter adrenaline twitch in their hand translates to less than 1 pixel of crosshair movement on screen.
6. Verified Pro Player Benchmarks & Tournament Setups (2027 Database)
To give you concrete reference points, here is how 10 of the world's most mechanically consistent professionals configure their DPI, sensitivity, eDPI, physical cm/360°, and peripheral hardware (verified in the DCPROSENS Pro Player Settings Database and testable head-to-head in our Pro Player Settings Compare Tool):
| Pro Player | Primary Title & Role | DPI | In-Game Sens | Effective eDPI | Physical cm/360° | Primary Mouse & Surface Pairing |
|---|---|---|---|---|---|---|
| TenZ | Valorant (Flex / Duelist) | 800 | 0.300 | 240 | 54.43 cm | Lamzu Atlantis / Superlight 2 + Artisan Zero |
| Aspas | Valorant (Entry Duelist) | 800 | 0.400 | 320 | 40.82 cm | Logitech G Pro X Superlight 2 + Artisan Zero |
| Demon1 | Valorant ( Precision Rifler) | 1600 | 0.100 | 160 | 81.64 cm | G-Wolves HTS+ 4K + Artisan Hayate Otsu |
| zekken | Valorant (Aggressive Entry) | 1600 | 0.175 | 280 | 46.65 cm | Razer Viper V3 Pro + LGG Saturn Pro |
| Boaster | Valorant (IGL / Controller) | 800 | 0.250 | 200 | 65.31 cm | Logitech G Pro X Superlight 2 + ZOWIE G-SR-SE |
| ZywOo | CS2 (Hybrid AWPer / Rifler) | 400 | 2.000 | 800 | 51.95 cm | Pulsar Xlite V3 eS + Custom Control Cloth |
| m0NESY | CS2 (Primary AWPer) | 400 | 2.300 | 920 | 45.18 cm | Logitech G Pro X Superlight 2 + SteelSeries QcK Heavy |
| NiKo | CS2 (Entry / Deagle Specialist) | 400 | 1.400 | 560 | 74.22 cm | ZOWIE EC2-DW 4K + Artisan Ninja FX Zero |
| s1mple | CS2 (High-Sens AWPer) | 400 | 3.090 | 1236 | 33.63 cm | Logitech G Pro X Superlight 2 + Hybrid Speed Pad |
| ImperialHal | Apex Legends (IGL / Frag) | 400 | 2.000 | 800 | 51.95 cm | Logitech G Pro X Superlight 2 + Artisan Hayate Otsu |
Notice the pattern across every single champion on that list: 80% of elite tactical pros cluster between 40 cm/360° and 65 cm/360°, with fast-movement dive/AWP players sitting on the 33cm to 45cm edge and pure headshot anchors sitting on the 65cm to 82cm edge.
7. Hardware Engineering: Sensor CPI Deviation, 8000Hz Polling & Gear Pairings
Even if you calculate vertical vs horizontal sensitivity fps to four decimal places, your hardware can silently introduce a 3% to 8% error before a single packet reaches the game engine. Here are the three hardware variables you need to audit:
7.1. Optical Sensor CPI Deviation (Why 800 DPI Is Rarely 800 DPI)
Due to manufacturing tolerances in optical lenses, aftermarket PTFE/glass mouse skate thickness (0.60mm vs 0.85mm), and cloth weave depth, a mouse set to 800 DPI in firmware frequently tracks at 775 CPI on one mousepad and 835 CPI on another. That is a 7.7% physical sensitivity swing! Always run a 10-centimeter physical ruler swipe inside our free Mouse DPI Analyzer and apply the exact compensation equation:
- DPI Deviation Compensation Equation:
True In-Game Sens = Target Sens × (Nominal DPI ÷ Measured Real CPI)
7.2. 1000Hz vs. 4000Hz vs. 8000Hz Polling Rate Saturation
At 1000Hz, your mouse reports position every 1.000ms. At 4000Hz (0.250ms) and 8000Hz (0.125ms), the USB host controller polls the mouse up to eight times per millisecond. However, if you play at 400 DPI and move your hand slowly during a long-range micro-adjustment (5 cm/s), your sensor only generates ~79 counts per second—leaving over 98% of those 8000Hz USB frames completely empty! To actually saturate 4000Hz or 8000Hz polling and get smooth sub-tick cursor updates on a 360Hz, 480Hz OLED, or 540Hz TN monitor, set your hardware DPI to at least 1600 DPI (and divide your in-game sensitivity by 2 in our DPI & eDPI Calculator) while enabling RawInputBuffer in-game.
7.3. Lab-Tested Hardware Recommendations by Sensitivity Tier
- For Low-Sensitivity Arm Aimers (
50 cm/360°to85 cm/360°): You need an ultralight mouse (<55g) to eliminate wrist inertia during wide recentering lifts and a large490mm × 420mmcontrol/hybrid pad. Top lab picks: Razer Viper V3 Pro (54g, Focus Pro 35K Gen-2), Logitech G Pro X Superlight 2 (60g, HERO 2 8000Hz), or ZOWIE U2 / ZA12-DW paired with an Artisan Ninja FX Zero XL Soft or LGG Saturn Pro. - For High-Speed Tracking & Hybrid Aimers (
25 cm/360°to42 cm/360°): Micro-corrections live or die by low static friction. Pair a fingertip/claw mouse with a Wallhack SP-004 Tempered Glass Pad or Artisan Hayate Otsu XSoft, and use a Wooting 80HE or Razer Huntsman V3 Pro analog keyboard (0.15mmRapid Trigger) so your counter-strafes keep pace with your flick speed. - For Console & Hybrid GTA VI / Apex Players: Eliminate potentiometer stick drift permanently by upgrading to Hall Effect or TMR (Tunneling Magnetoresistance) thumbsticks on the Razer Raiju V3 Pro, Nacon Revolution 5 Pro, 8BitDo Ultimate, or Sony DualSense Edge (replaceable stick modules + full RAGE 9 adaptive trigger support).
8. Step-by-Step Calibration & Verification Protocol (Do This in 10 Minutes)
Follow this exact 7-step engineering checklist whenever you configure vertical vs horizontal sensitivity fps so you never second-guess your settings mid-match:
- Lock Windows 11 Pointer Speed to
6/11& Kill Acceleration: OpenSettings → Bluetooth & devices → Mouse → Additional mouse settings → Pointer Options. Verify the slider sits on the 6th notch from the left (10/20in the modern panel) and uncheck "Enhance pointer precision." Even when a game uses Raw Input, keeping Windows 1:1 prevents menu-cursor muscle memory conflicts when looting or buying weapons. - Measure Your Real Hardware CPI: Open the Mouse DPI Analyzer, place a physical ruler or a standard credit card (
8.56 cmwide) against the left shell of your mouse, and slide smoothly across the marked distance. Note your true measured CPI. - Compute Your Exact Target Value: Open the 1:1 Mouse Sensitivity Converter, select Apex Legends and Deadlock, enter your DPI and sensitivity, and copy the exact 4-to-6 decimal output.
- Inject via Config File or Console (Bypass Coarse Sliders): Whenever possible, paste your sensitivity directly into the developer console (
~key:sensitivity 1.0001) or the local configuration file (GameUserSettings.ini,autoexec.cfg, orPROFSAVE_profile) rather than dragging an in-game UI slider that rounds to one decimal place. - Run the Physical 180-Degree Tape Test: Load into an offline practice range, aim at a sharp vertical wall edge, place a piece of painter's tape against the left side of your mouse, and swipe exactly half of your
cm/360°distance (25.98 cmfor a51.95 cm/360°setup). Your crosshair should land within1°of the opposite wall behind you. - Calibrate Scoped & ADS Multipliers (
0% MDM): Open our 1:1 ADS & Scope Sensitivity Calculator and set your zoom multiplier (0.847in Valorant,0.818933in CS2, or0.00Relative Coefficient in CoD/Battlefield) so micro-flicks feel identical whether hipfiring or scoped. - Run a 5-Minute Binary Micro-Flick Stress Test: Jump into the DCPROSENS Aim Studio or use the PSA Method Calculator for 5 minutes of alternating wide-target switching and tiny 2-degree micro-clusters. If you consistently overshoot on the first ballistic flick, lower your sensitivity by
3%; if you consistently stop short and drag-correct, raise it by3%.
9. Troubleshooting Diagnostic Matrix: Fixing Common Aim Symptoms
If your aim still feels inconsistent after converting, use this diagnostic table to isolate whether the root cause is your sensitivity, your FOV/ADS scaling, your mousepad friction, or system DPC latency:
| In-Game Symptom | Primary Root Cause | Exact Engineering Fix |
|---|---|---|
| Consistently overshooting past heads on wide flicks | Kinetic mouse inertia too high or dynamic pad friction too low for your cm/360°. | Reduce in-game sensitivity by 4% to 6% or switch from fast PTFE dot skates to full-size control skates. |
| Crosshair feels "stuck in mud" on tiny 1-pixel head adjustments | High static friction ("stiction") on a humid cloth pad or excessive death-grip finger tension. | Relax click-finger tension by 30%, switch to 1600 DPI (same eDPI), or test a hybrid Poron/glass pad. |
| Hipfire feels great, but sniper/ADS scope feels way too fast | Game is defaulting to 100% Monitor Distance Match instead of 0% focal-length scaling. | Set Valorant Scoped Multiplier to 0.847 or CS2 zoom_sensitivity_ratio to 0.818933 via ADS Calculator. |
| Diagonal flicks feel warped or stair-stepped | Altered m_yaw (0.0165) on 4:3 stretched resolution or angle snapping enabled in mouse firmware. | Reset m_yaw to default 0.022 immediately and disable Angle Snapping in Razer Synapse / G HUB / Web Driver. |
| Aim feels crisp in practice range but heavy in 5v5 / 6v6 teamfights | CPU render-queue bottleneck or USB 4000Hz/8000Hz interrupt saturation dropping 1% Low FPS. | Enable NVIDIA Reflex On + Boost, turn on RawInputBuffer, or drop polling from 8000Hz to 2000Hz/4000Hz. |
| Running out of mousepad space during long tracking duels | cm/360° exceeds your usable pad width (W_min = 0.65 × cm/360 + 6.5cm) or poor mouse recentering habit. | Upgrade to a 490mm × 420mm XL pad, lower LOD to 1.0mm, or shift your cm/360° into the 40–48 cm hybrid zone. |
Frequently Asked Questions
What is the exact conversion multiplier for vertical vs horizontal sensitivity fps?
The exact mathematical conversion multiplier from Apex Legends (yaw = 0.022) to Deadlock (yaw = 0.022) is 1.0 (and 1.0 in reverse). As long as your mouse DPI is the same in both games, multiplying by 1.0 locks your physical cm/360° distance to the millimeter. You can also bookmark our 1:1 Mouse Sensitivity Converter or install the DCPROSENS Android App for instant mobile lookups at LANs.
Does changing my monitor resolution (1920×1080 vs. 1280×960 4:3 Stretched) change my sensitivity?
No. In modern 3D engines using Raw Input, camera rotation is calculated strictly in degrees per mouse count (yaw × sens), not in screen pixels. Changing from 1920×1080 (16:9) to 1280×960 (4:3 stretched) leaves your physical cm/360° 100% identical; it only stretches the horizontal FOV projection on your monitor, making targets appear 33% wider and faster-moving horizontally. Never change m_yaw from 0.022 to 0.0165, as that breaks your 1:1 X/Y diagonal muscle memory.
Why does 1600 DPI at half sensitivity feel smoother than 800 DPI at full sensitivity?
Both setups produce the exact same eDPI and cm/360°, but 1600 DPI halves the physical distance your hand must move before the optical sensor registers its very first count (0.0158 mm per count at 1600 DPI vs. 0.0317 mm at 800 DPI). On high-refresh monitors (240Hz to 540Hz) and 4000Hz/8000Hz wireless mice, 1600 DPI feeds a denser stream of micro-counts into the game's sub-tick buffer, reducing initial motion latency by roughly 1.5ms.
How long should I stick with a new sensitivity before judging if it works?
Give any new sensitivity at least 3 to 5 days (or four 15-minute sessions in the DCPROSENS Aim Studio) before tweaking it again. Your motor cortex adapts to new macro-sweep distances within 30 minutes, but your unconscious fingertip micro-braking under ranked match pressure takes a few sleep cycles to fully consolidate.
Should I use the same cm/360° in tactical shooters (Valorant/CS2) and tracking shooters (Apex/Overwatch 2/Marvel Rivals/Deadlock)?
Not necessarily. Many top pros keep two distinct biomechanical gears: a slower, ultra-stable 48cm to 65cm/360° gear for low-TTK tactical shooters where crosshair placement and 1-tap precision dominate, and a faster 28cm to 38cm/360° gear for high-mobility arena/hero shooters that demand constant 180-degree turns and vertical tracking. If you want one universal sensitivity across every game you play, 38cm to 45cm/360° is the proven hybrid sweet spot.
How can I get a custom 1-on-1 sensitivity, hardware, and Windows input-lag audit?
If you want your entire setup—mouse CPI deviation, pad friction pairing, Windows 11 DPC/USB interrupt latency, and per-game 0% MDM configs—calibrated for your exact hand size and main games, check out our DCPROSENS Pro & 360° VIP Overhaul Plans.
Pro-Recommended Esports Gear
Top-tier ultralight mice recommended for tournament sensor precision and mousepad tracking consistency:
Logitech G Pro X Superlight 2
The most winning wireless mouse in competitive esports. Iconic shape, HERO 2 sensor, and hybrid optical-mechanical switches.
Razer Viper V3 Pro
Flawless sensor with native 8,000Hz wireless polling rate and a modern symmetrical shape built for elite tracking.
Razer DeathAdder V3 Pro
Engineered for palm and claw grip players needing anatomical support. Flagship Focus Pro 30K optical sensor.
Lamzu Atlantis OG V2 / Thorn
Boutique ultralight mouse with locked-in rear hump. Perfect for aggressive claw grip and micro-adjustments.
Dalto Cardoso (Dalto Outlier)
✓ Verified Founder, DCPROSENSSoftware developer and founder of DCPROSENS (DCOUTLIER). Dalto engineers precision sensitivity calculators, yaw telemetry databases, and hardware calibration guides for competitive FPS players.
Related Guides & Articles
Disclosure: some links on this page are affiliate links. As an Amazon Associate, DCPROSENS earns from qualifying purchases at no extra cost to you.